Mailchimp: Connect Continually to Mailchimp
You can pass any lead information you have captured with Continually over to your Mailchimp lists.
In this article we cover:
How to Connect your Mailchimp account
To start this section you need to sign into your Continually account and go to Apps page.
- 1
- Find the Mailchimp app on the apps page and click on the Connect button
- 2
- This will take you to an authentication step where you will need to sign into your Mailchimp account
- 3
- Once you have signed into your Mailchimp account you will be directed back to the Continually app where you can start adding automations or sync existing
How to add an automation
After you connect your account you will need to start adding the automations you want. You can add unlimited number of automations with different settings.
- 1
- Open the Mailchimp Preference page if you moved away from it. Click on the + New automation button.
- 2
-
Select the bot you want to map, or you can map all bots to a Mailchimp list.
Then choose the Contact status for the added lead whether they are added as Subscribed contacts or Double opt-in contacts (Mailchimp will send them an email to verify their addition to the list).
Lastly, select how tags are mapped for this list, there are two options:
- Map Continually tags to Mailchimp: We will check the leads' tags and find them in Mailchimp, if found we will add the leads to it, if not we will create a new tag and add the lead to it.
- Select Specific tags: Choose this option and select a specific tag in Mailchimp which we will add the leads for this selected list to it. You will also be able to map Continually tags as a custom field into Mailchimp.

- 3
-
Now it is time to map Continually fields to your Mailchimp fields. We offer you the ability to automatically map the Continually fields with Mailchimp fields that matches each other, making it easier for you to map them. If you have Mailchimp fields that we cannot find in Continually you will have an option to create and map them as well.
You can also map each field manually or create Mailchimp fields on the spot and map them automatically.
-

How to execute automation within a bot
With the Apps power up object inside the bot builder, you will be able to execute automation actions within the conversation directly. These automations will be controlled in the bot builder and executed instantly when the Apps object is reached in conversation.
- 1
- Open the bot that you want to add the automation to.
- 2
- Drag and drop the Apps power-up object into the conversation, connect it to the flow, click on it and choose Mailchimp.
- 3
- Select the Mailchimp list you want to sync, the contact subscription status and how you want to map tags, then click on Create automation.
-

- 4
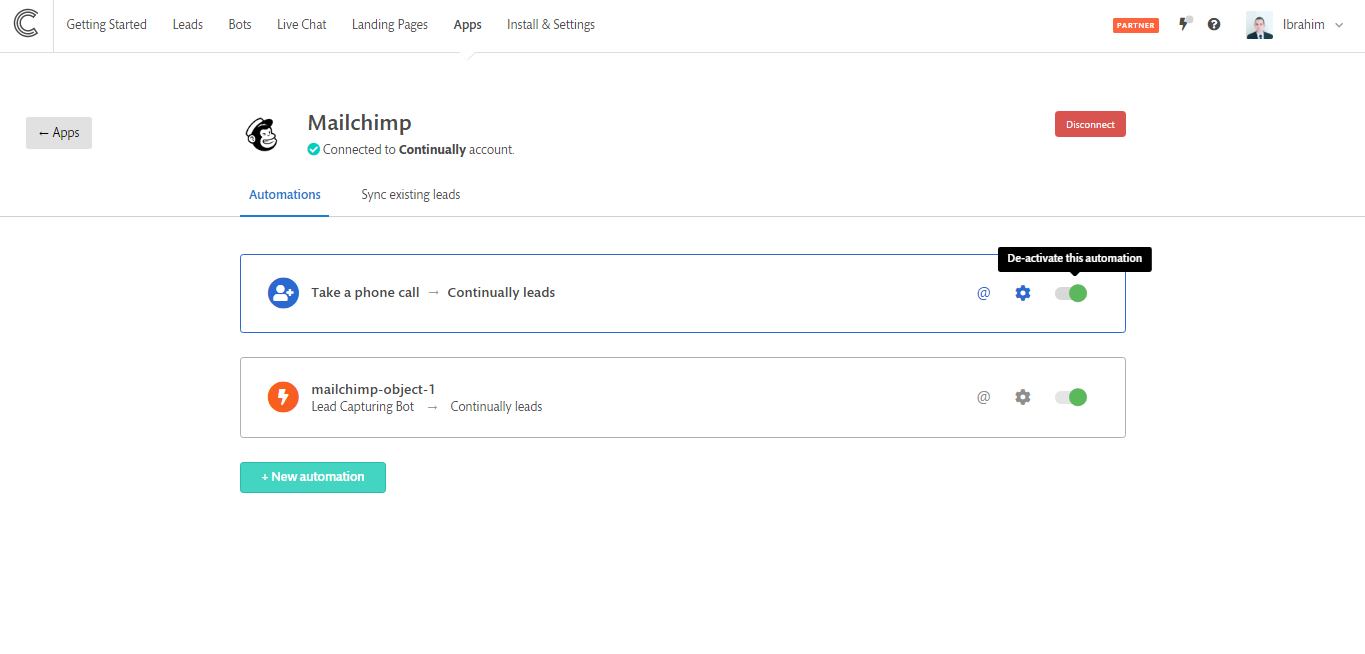
- After creating the automation, you will be able to map your custom fields to the fields in Mailchimp, you can also access this automation in the Mailchimp preferences page. Instant automations will have an orange lighting icon next to them, while general integration will have a blue user icon.
-

How to sync existing leads
When you create automations you will be syncing the leads that will be captured after the automation is made, if you wish to sync all the previously captured leads from a single bot or all bots, you can do that from the Mailchimp preferences page. Keep reading to learn more:
- 1
- Go to the Apps page, find Mailchimp integration and click on View Preferences.
- 2
- Click on the Sync existing leads tab.
- 3
- Select the bot you wat to sync or select All bots, then select the Mailchimp list and click on Sync existing leads button . After that the leads will be sent to Mailchimp to be processed and added.
-

How to deactivate or delete automations
Sometimes you want to delete your automations or deactivate them temporarily, this can be achieved easily in the Mailchimp preferences page, all you need to do is to toggle the De-activate button to deactivate an automation temporarily till you turn it back on.
To delete an automation click on the gear icon to open the automation settings, scroll down and click on the Delete button, for instant automations the gear icon will open the bot where the automation is used at, you will need to delete the automations object to delete it.