Assign custom fields to a lead
There are two ways you can use to assign custom fields to a lead. You are able to add data for a custom field directly on a lead's profile or set the custom field value automatically in the conversation.
Set custom fields in lead's profile
- Start by finding the lead profile that you want to add custom fields too.
- Scroll down and find the custom fields section then click on +Set custom field
- Select the custom field you want, then enter the answer you want.
- Then click on the field or hit return to save your answer.
Set Custom Fields in conversation
You have the ability to save the visitor's input or choice into a custom field, but sometimes you want to set different values for your custom fields or you want to keep changing or updating a custom field as you want.
Also, you can use some of these fields to change the flow of the conversation or to send the custom field values to different integrations.
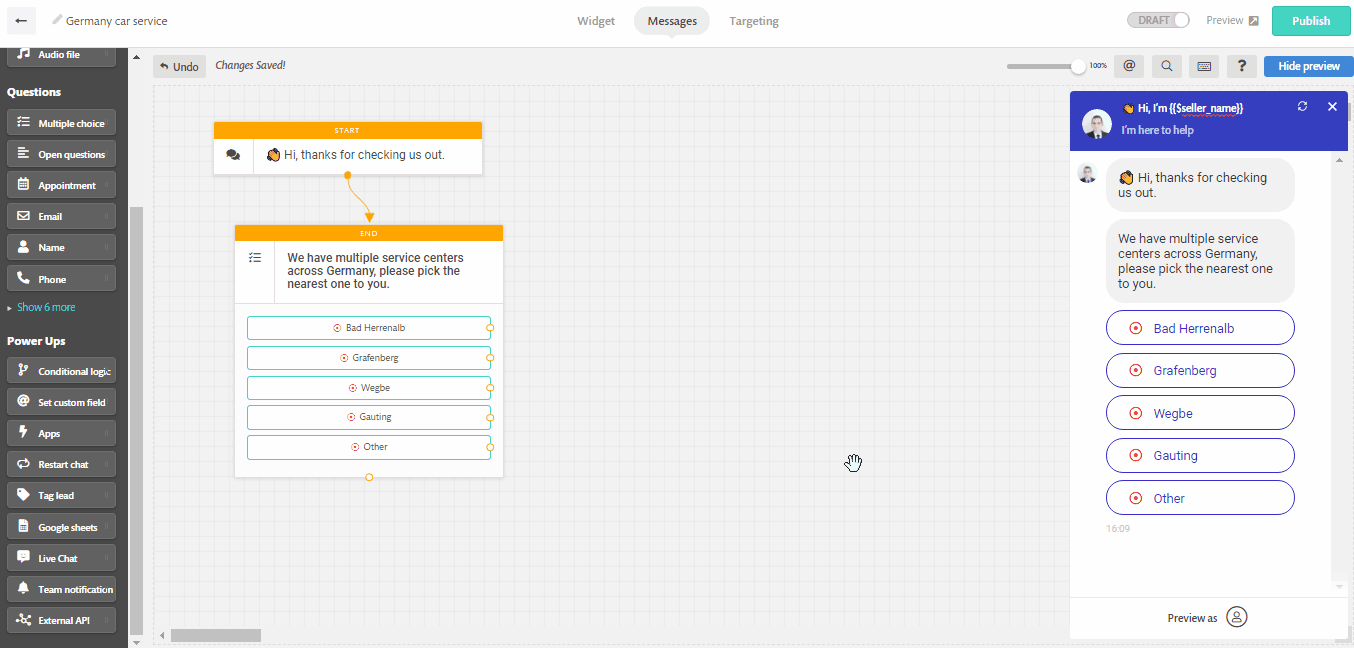
To set a custom field in conversation, follow these steps:
- Go to the bots page and open the bot you want to use.
- From the left sidebar, drag and drop the 'Set custom field' powerup object into the canvas.
- Click on the object to open it, choose the custom field you want to set and enter its value. Don't forget to connect the object to the conversation flow. And that's it.
In the following image we have an example for a car service bot where the visitor will pick the nearest car service center to him, we want to set a custom field that contains the service center code.