How to use the Live chat object
Looking to qualify your leads before allowing them to use live chat? Add a live chat object anywhere in your conversations and it will hide the message field from your customers until they reach that point!
In this article we will cover:
Using the live chat object
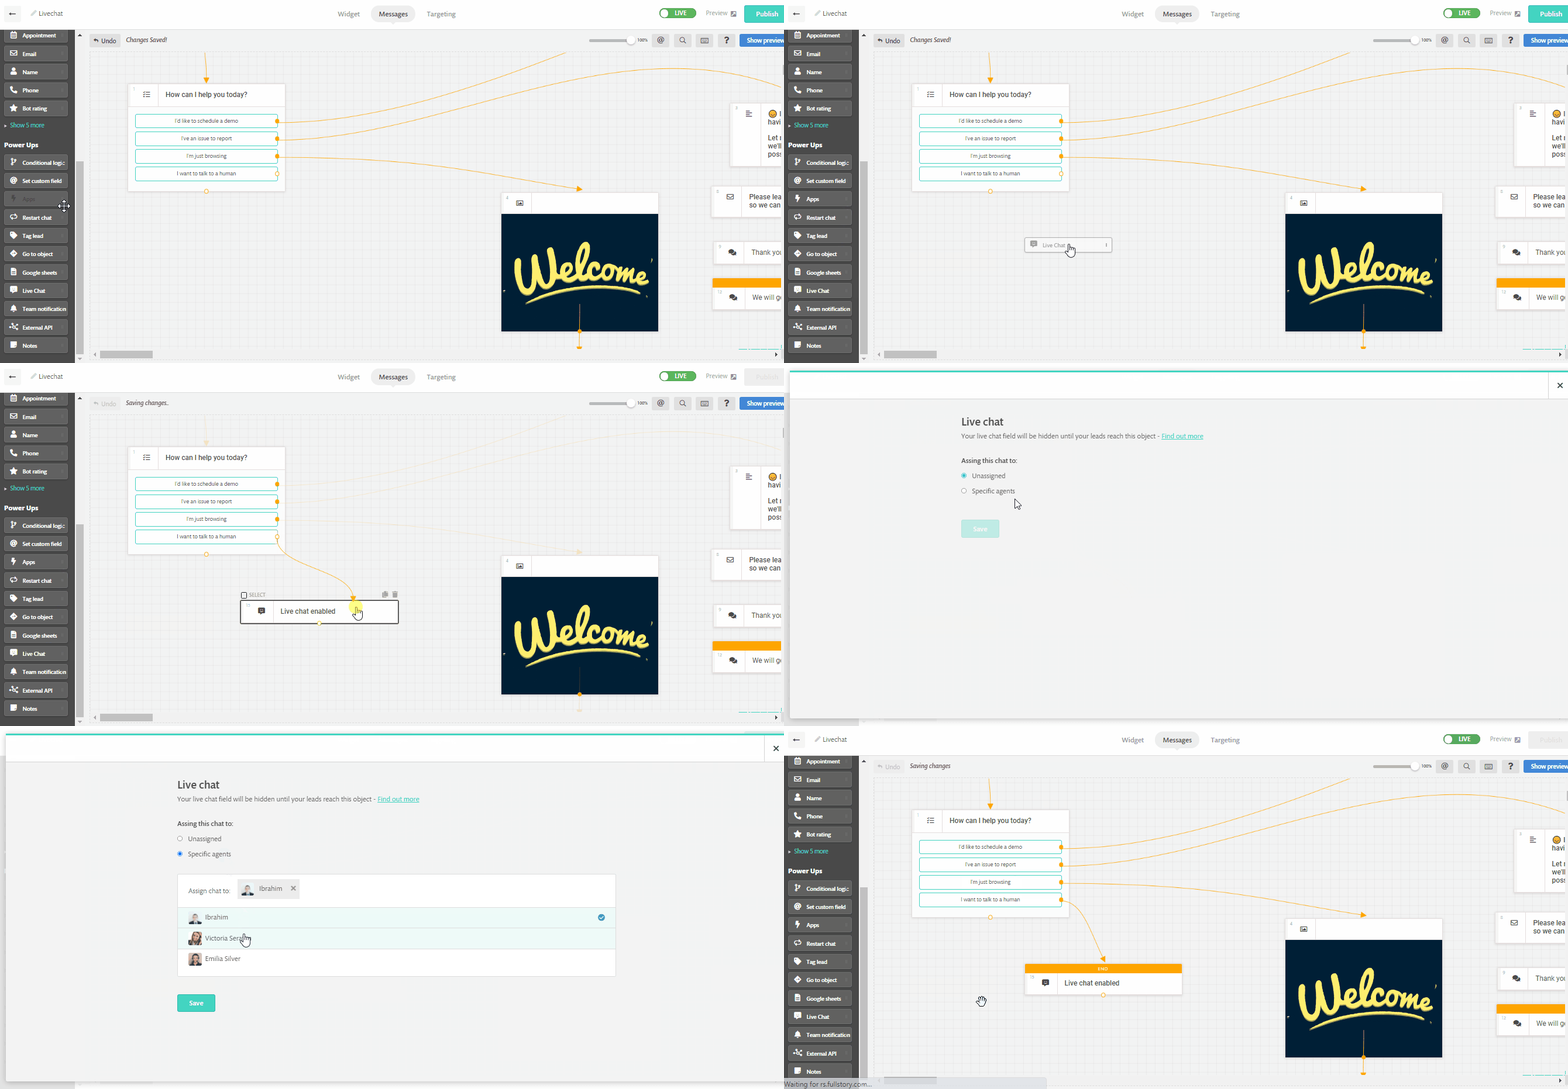
Open the bot you want to have the live chat field on. Drag and drop the Live chat object from the left sidebar to the canvas. Connect the object where you want to show the live chat field.
Click on the Livechat object to edit its settings, you will have an option to assign automatically the live chat conversation to one or more of your agents. When there are multiple agents selected, we will assign the conversations in a "round-robin" arrangement so that conversations are distributed equally.
So if there are 4 agents selected, Continually will go through the list assigning a lead to each agent and then starting from the beginning again.
Add a message after the livechat object to encourage your leads to write their question in the livechat field.

Now let's test how it will appear in real-time :

You can combine this object with other power-ups objects like Conditional logic to set rules for qualifying leads. This way you can make sure your time is spent on the right customers.
Required rules for the object to work
The object doesn't have any settings to adjust or change, but there are some global rules that must be met for the object to work and show the live chat field.
- Live chat must be turned on.
- If you chose to show live chat on certain bots only, then the bot that has the object must have live chat enabled for it.
Note: If you set your settings to hide live chat when you are offline, then the object won't show the live chat field when you are offline.
