03 - Getting started - Adding targeting
This article will help you target specific URLs where you want your bot to be displayed & also set targeting rules on which types of customers your want you bot to be shown to.
In this article
At the bottom of this article there will be links to other related articles.
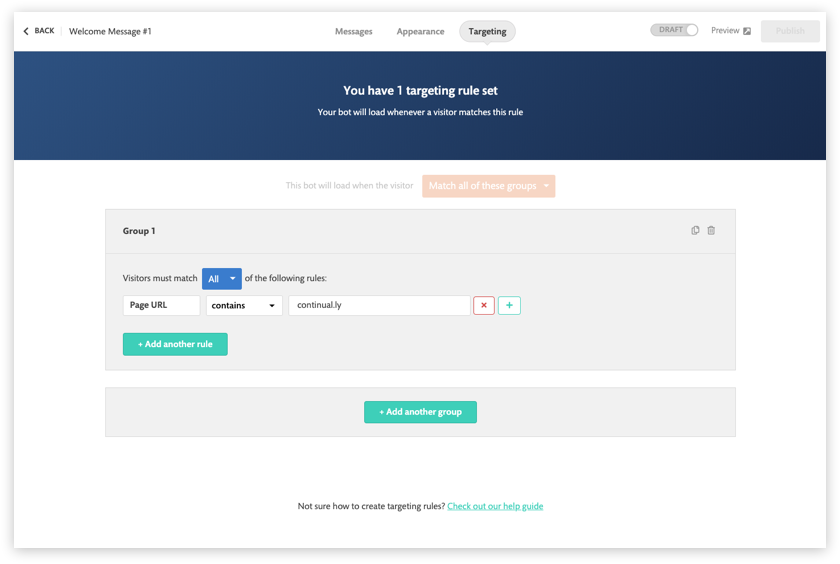
How to target a specific URL
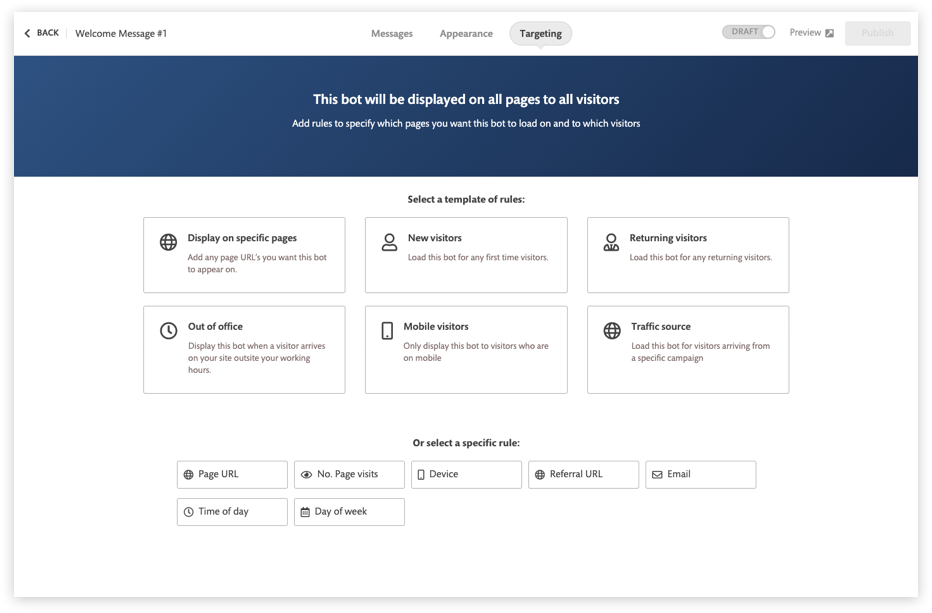
So you've built your bot now its time to decide where you want to display it on your site.
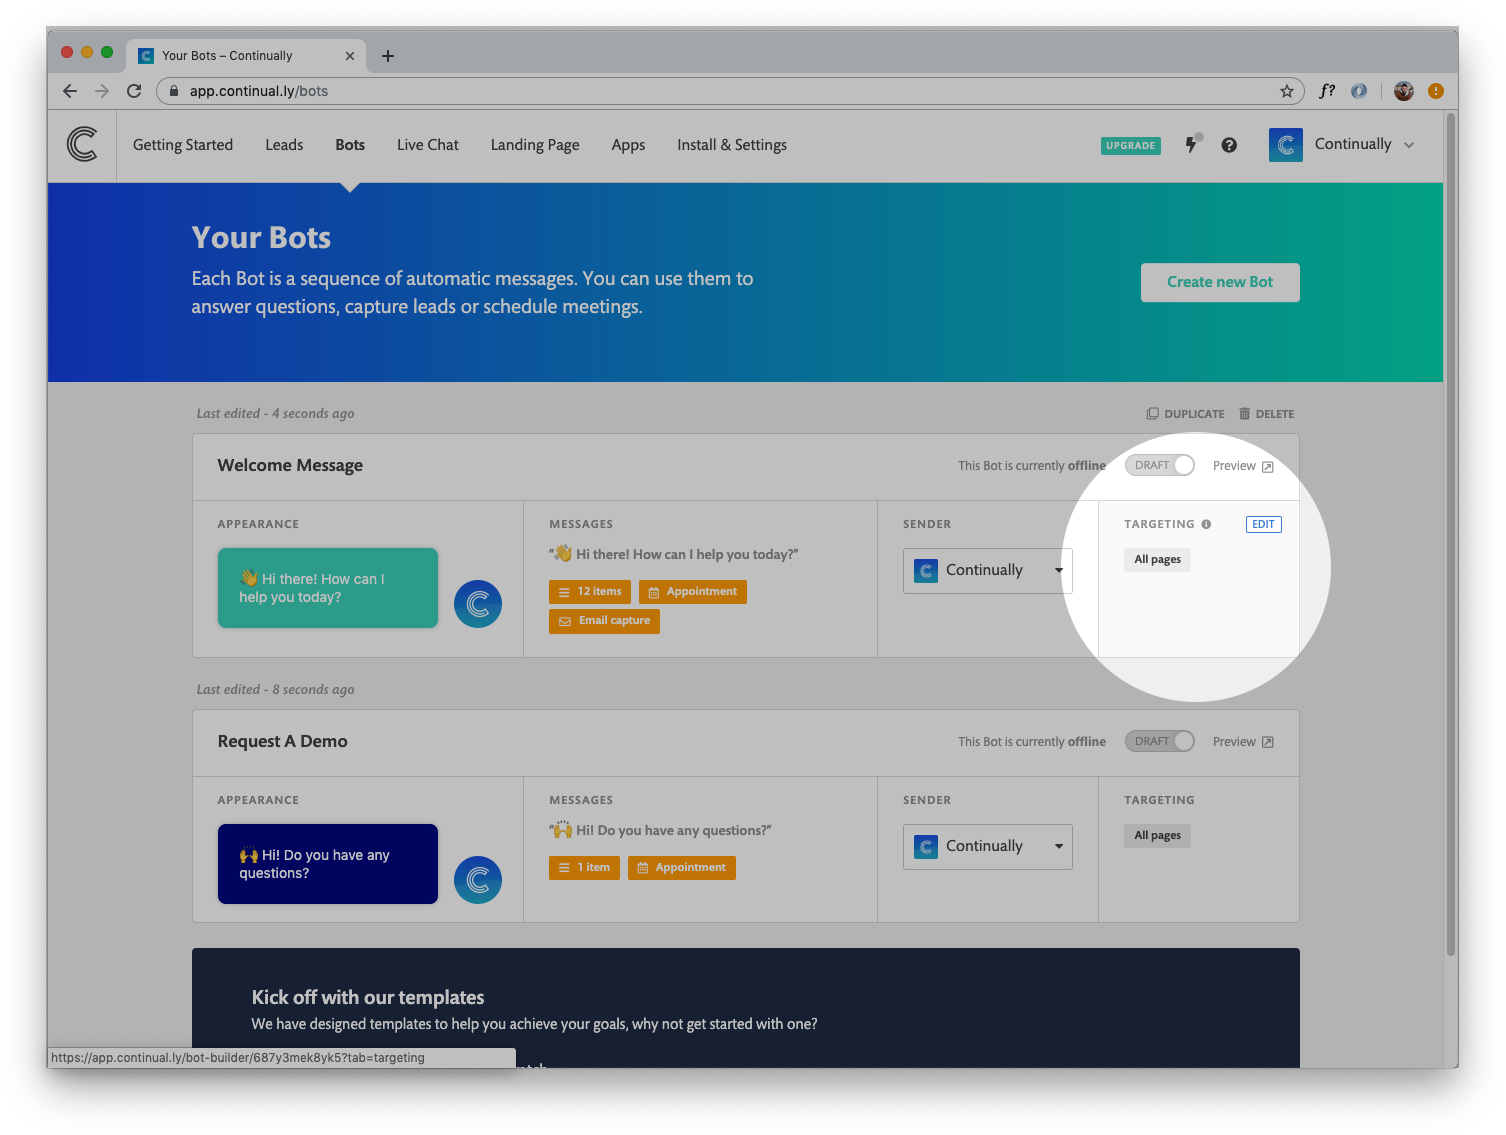
Note: By default when your bot has no targeting set and is live, it will be displayed on all pages.


How to target specific customers
As well as URL targeting you can also decide which customers you want your bot to display to by behavioural rules.
- Referral URL - Useful if you are targeting customers coming from a specific URL like an add campaign
- Email - Useful for targeting returning customers you already know
- Page visits - Useful for targeting new customers
- Device - Useful for targeting mobile users
- 1
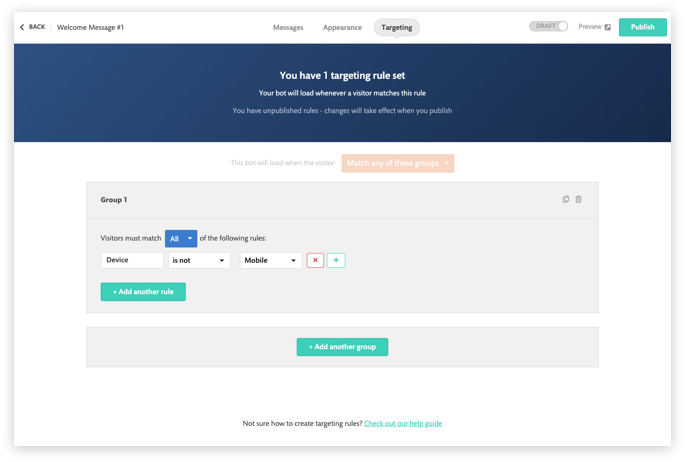
- Once you are on the targeting section inside the bot builder. Click on the Device option.
- 2
- Next select options from the dropdowns to create your rule then click publish to push your changes live.
In the example below, the rule is set to IS NOT - Mobile. This means that any visitors on mobile will not see this bot.

Note: If you are setting more than 1 audience rule. You can set it for your customers to Match all these rules or Match any of these rules
How to display different bots on your website
If you have more than one bot and you want to display them on different pages of your website. You first need to install the embed code on each page, then you need to add URL targeting to each bot.

Other related articles
