06 - Getting started - Calendar & Scheduling
This article will help get you to connect your calendar with Continually so you can let your customers book meetings directly from your website.
In this article
At the bottom of this article, there will be links to other related articles.
How to connect your calendar
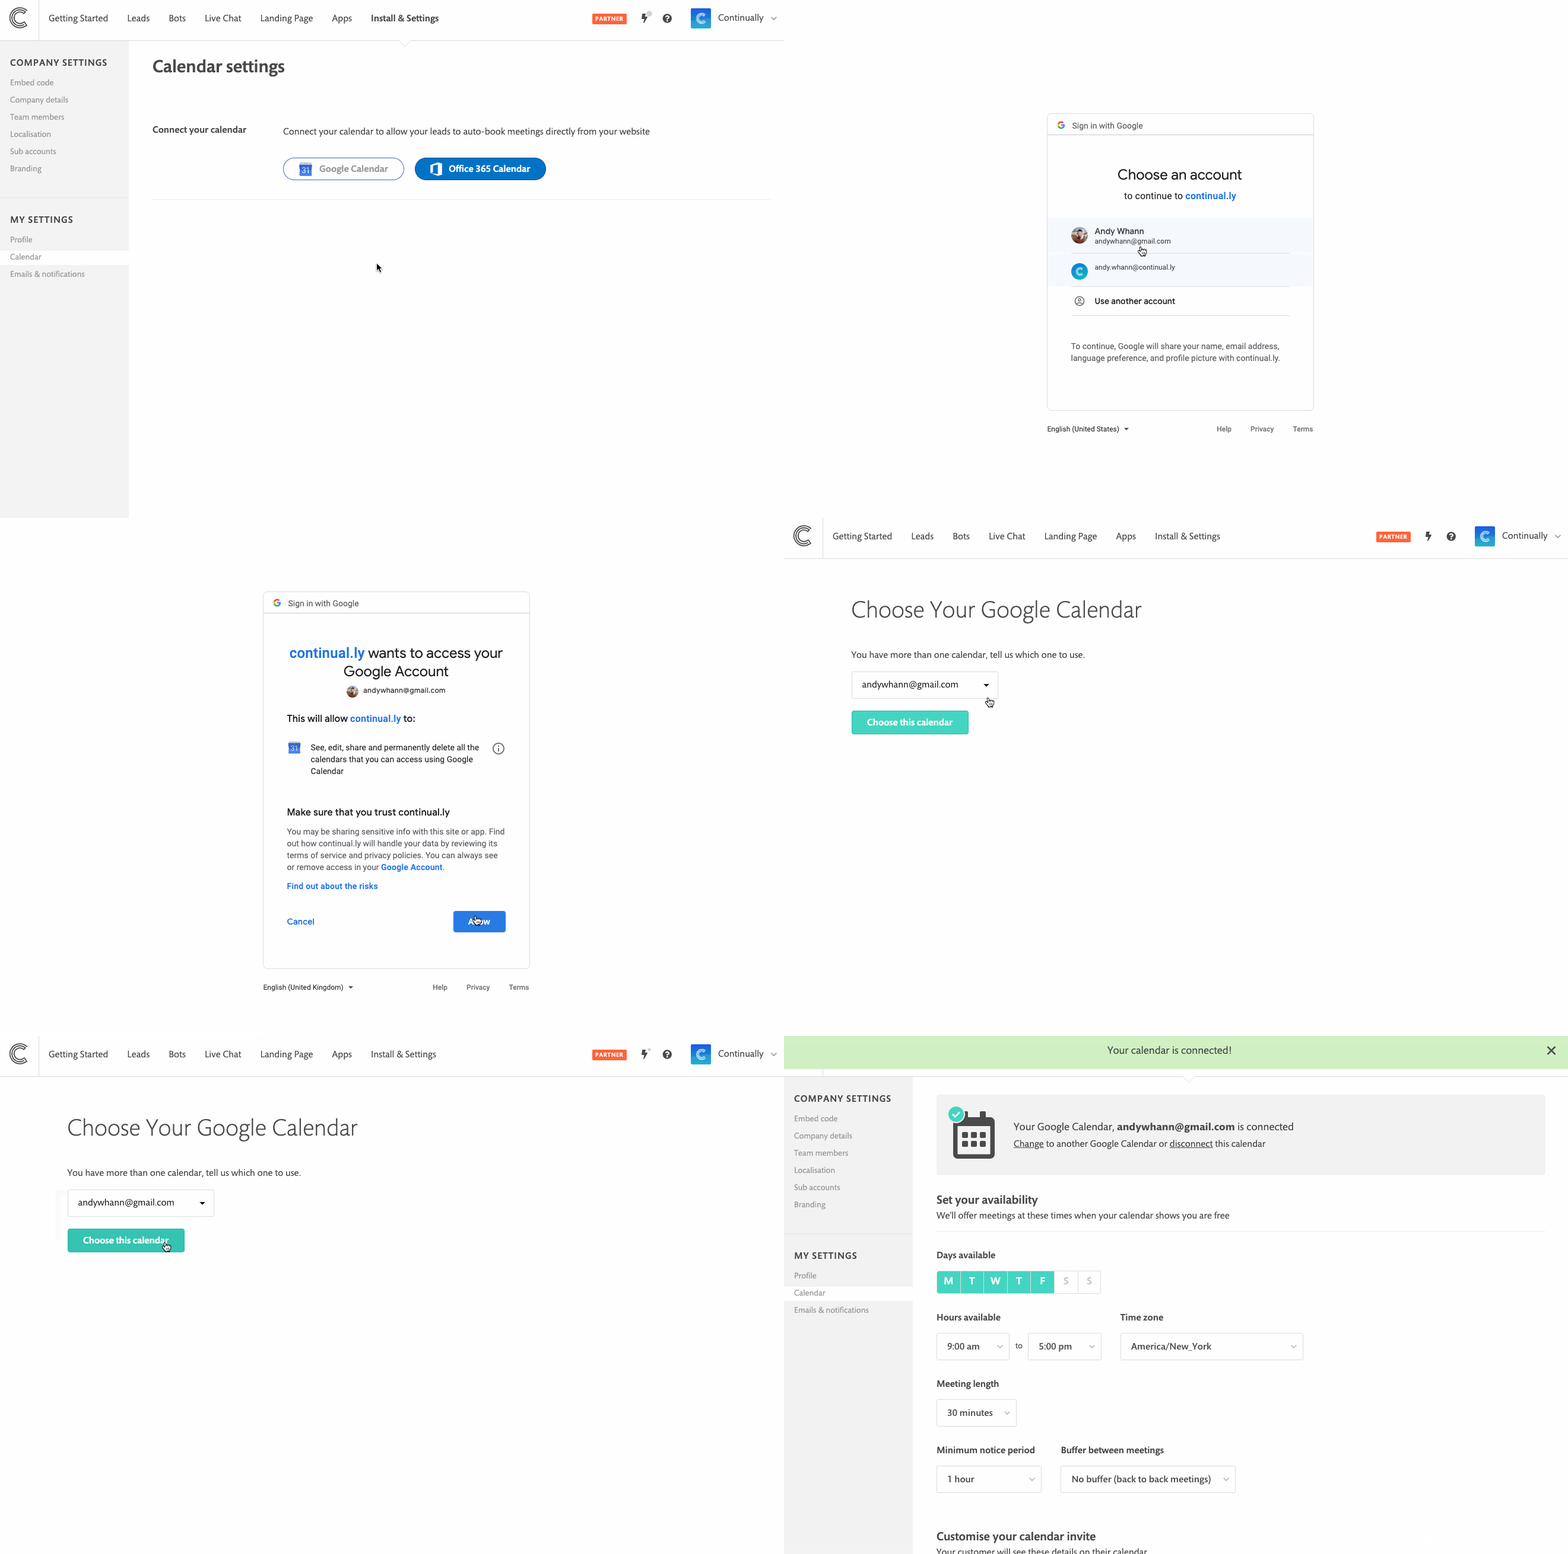
- Go to your calendar settings page and select which calendar service you want to use
- Sign into your calendar service
- Then finally select which calendar you want to use

Note: We use your calendar to detect your availability and also add new appointments to it.
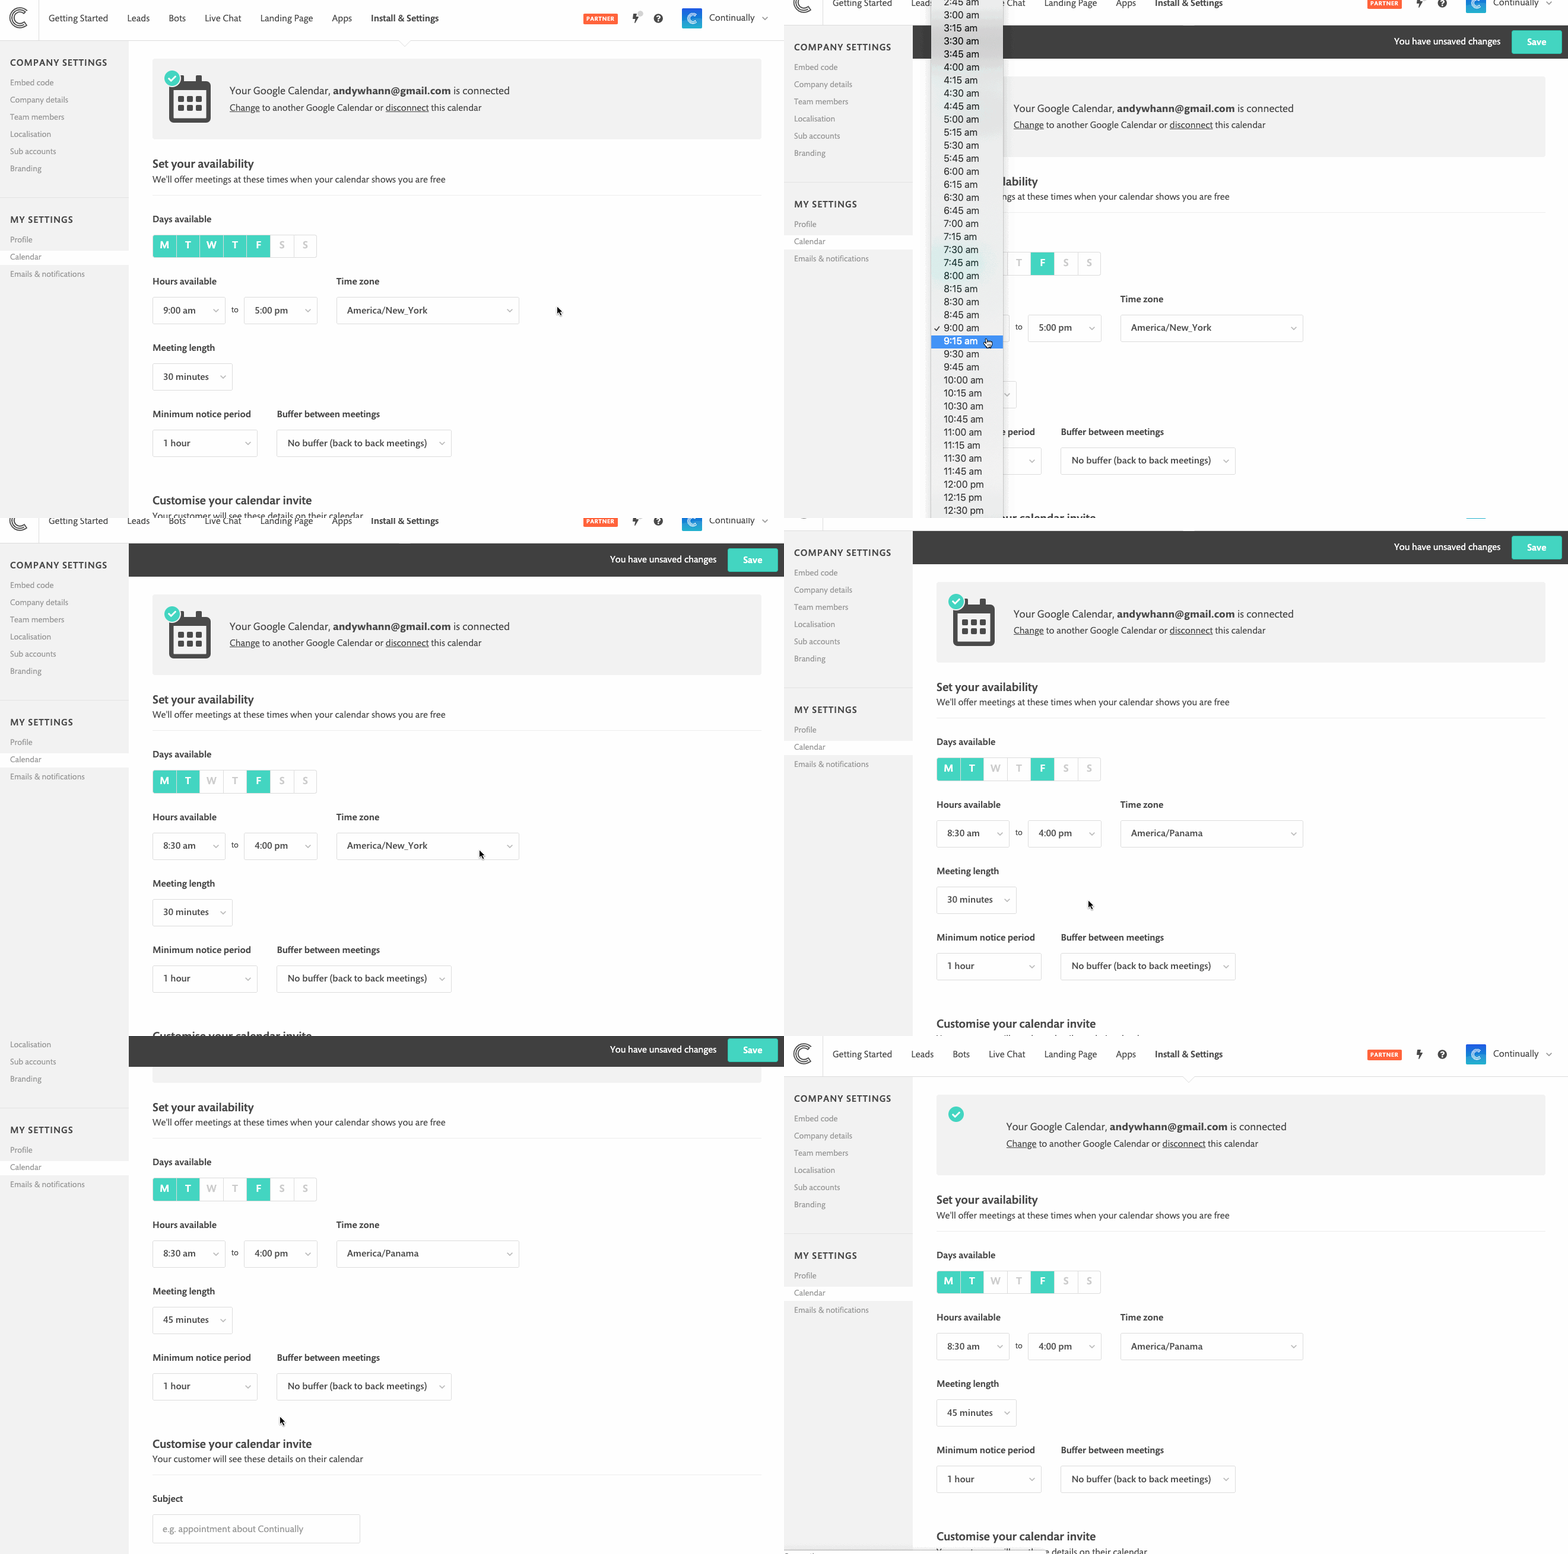
How to control your availability
You can control your availability from your settings page, you can choose:
- Which days and times you are available to take meetings.
- Your timezone
- Meeting length
- Minimum notice period
- Buffer period (time between meetings)

How to use your calendar in your bots
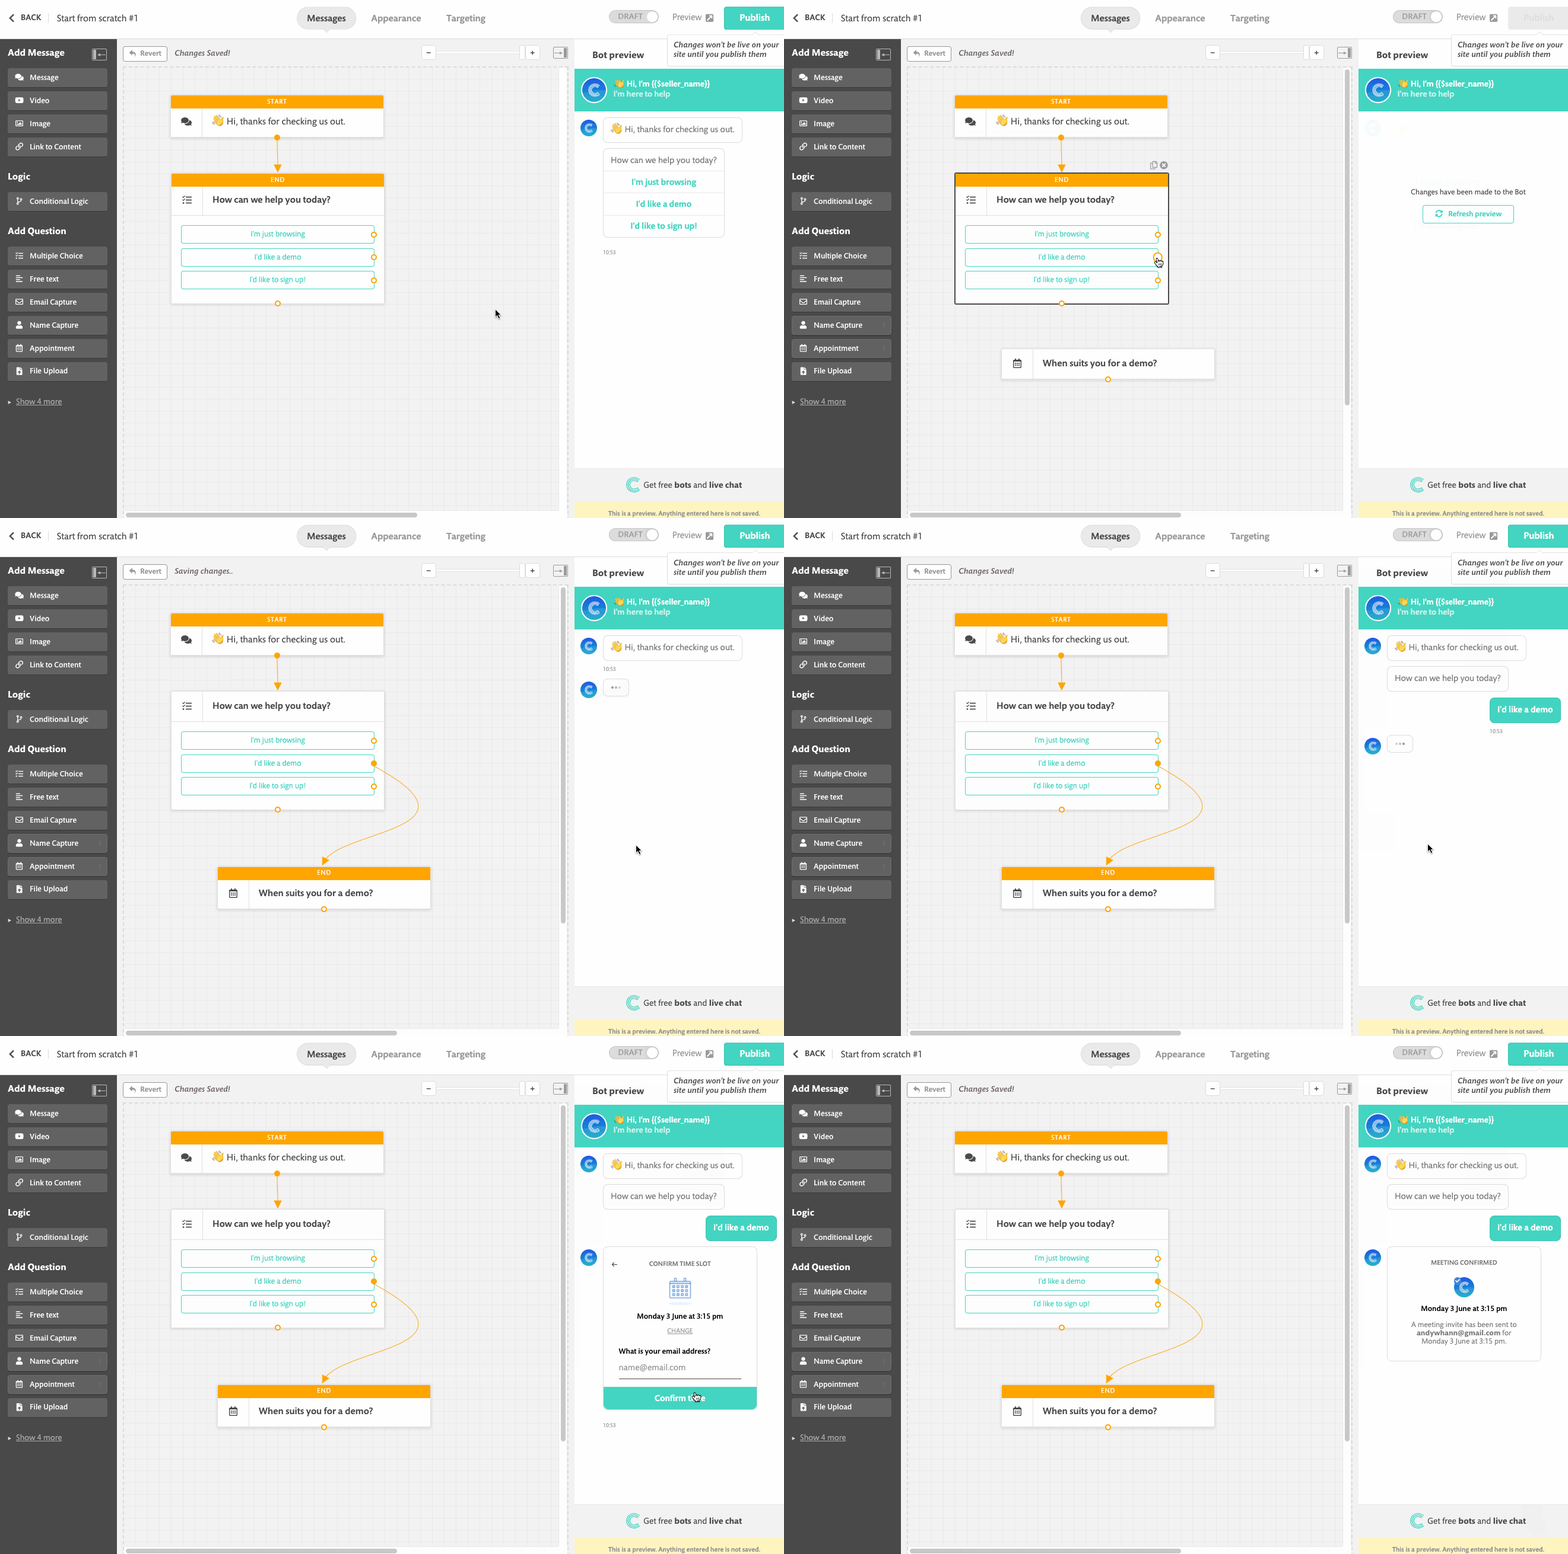
Once you have your calendar connected you want to have a bot set up that allows customers to book meetings.
- Find a bot you want to schedule meetings from and go to the messages section
- Once you're inside the builder, on the left drag an appointment object to your canvas.
- Connect it up and preview your new calendar object.

Note: We detect your users' timezone to show them what your availability is in their timezone so they can book meetings that suit them.
Note: You must be the agent of the bot for your calendar to be used. To find out how to change bot agent click here