How to schedule meetings using your chatbot conversation
Let your customers automatically book meetings from your bot
Continually lets you connect your Google or Exchange calendar and then use it in your chatbot's conversation!
In this article we will cover:
How do I connect my calendar?
- Go to the Apps page and find the calendar service you want to connect
- Click on connect and go through authorization steps (Giving authorization gives Continually the ability to add any customer meeting invites to your calendar)
- Next, you can select how many calendars you want to connect and then you're done!
How do I set my availability?
Once you have connected your calendar, you can control your availability on your Calendar settings page.
Once you have set your preferences and chosen the hours which you are available for meetings. Then we can check your calendar between those times and offer available slots to your customers.
For more details on setting your availability and keeping control of your calendar click here.
How do I add my calendar to my bot's conversation?
- Go to your bot's page and then click on the messages section of the bot you want to edit
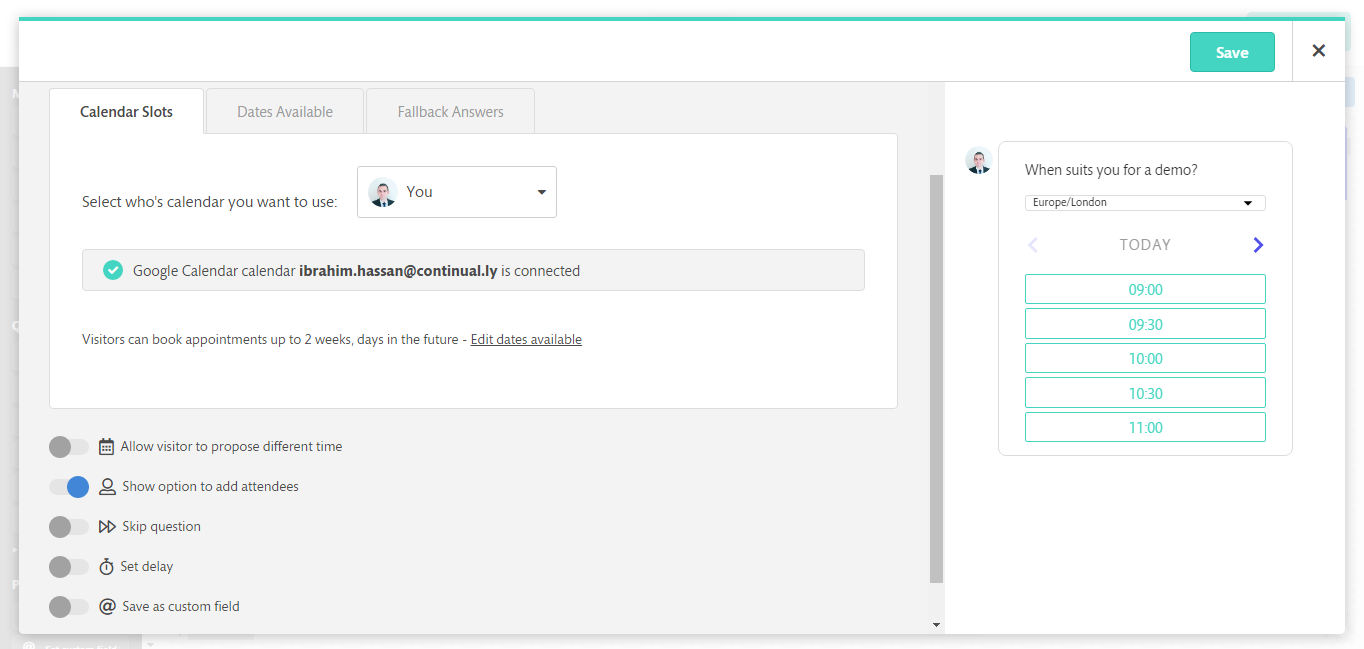
- Inside the messages section of the bot builder, click and drag an appointment object onto the canvas
- Click on the object to edit the message that is sent or select a teammate's calendar.
How to let leads add multiple attendees to a meeting
Sometimes when people book a meeting with you, they will want to add some of their colleagues or team members to the meeting. To make it easier for them you can enable the option ' Show option to add attendees'.

This way your leads will be able to enter multiple email addresses to that meeting invitation. Here is how it will look like :

Can I add my teammate's calendar?
Yes. If your teammate has connected their calendar with Continually, you can use it in your bot's conversation. This is set by changing the used calendar in the appointment object.
- Once you are inside the messages section of the bot builder and have added an appointment object.
- Click on the appointment object to open the editing modal
- Select your teammate from the drop-down, this dropdown will only display teammates with their calendar connected.
Note: When we are not able to connect and get your available times, we will display the Fallback Answers that you can specify. You can also customize them by adding custom fields to them.

Can I reject bookings?
Yes, we send you a notification letting you know that someone has requested a meeting at a certain time. You can then choose to accept and book the meeting or decline it.


