Elastic Email : How to integrate Continually with Elastic Email
Want to synchronize your captured leads in Continually to your mailing list on Elastic Email? Now you can connect Continually to Elastic Email directly. You can send over all leads or leads from a certain bot to any list you have in Constant Contact, keep reading to find out how.
In this article we will cover:
How to connect Continually to Elastic Email and set your first list
Go to the Apps page, find the Elastic Email integration and click on Connect, go to Elastic Email API page and create a new API key with the following permissions :
Account & Login : View
Contacts : View & Modify
Custom Fields : View & Modify
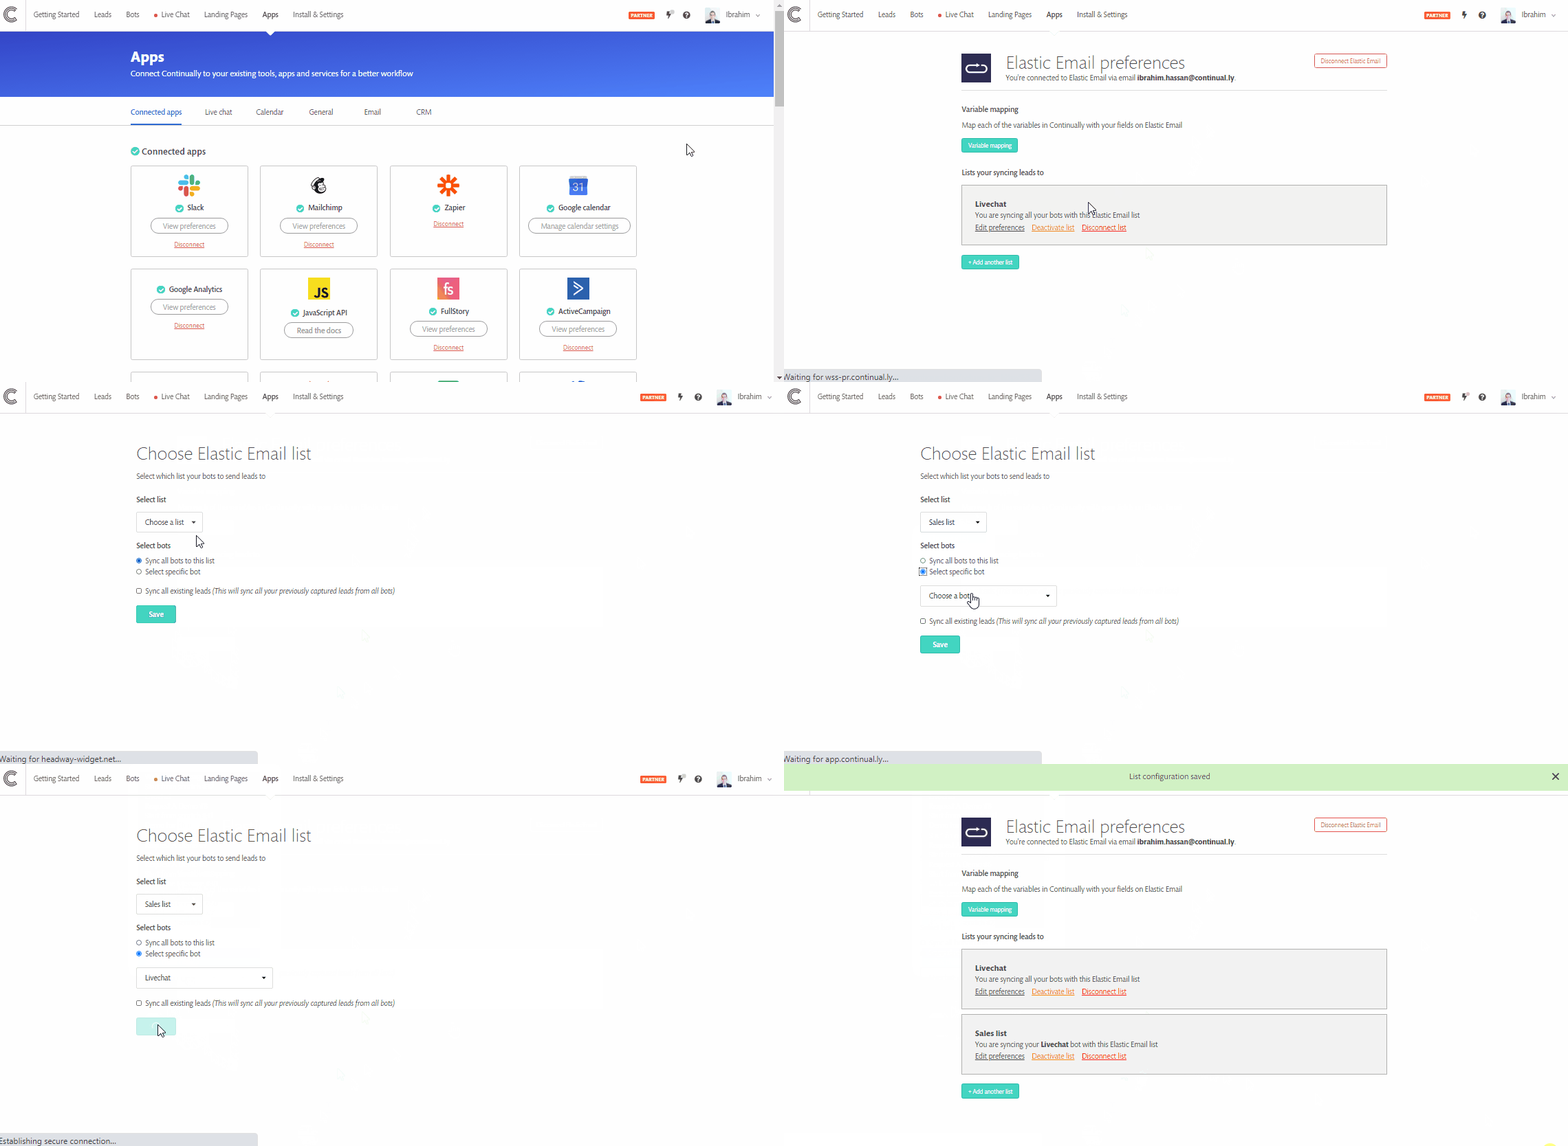
Copy and paste the API key and click on Connect, then choose your first list and select whether to sync all bots or select a single bot that you want to sync to that list.
You can also choose to sync all previously created leads to that list.

How to sync leads to a second List
- 1
- Go to your apps page, find the Elastic Email integration and click View preferences
- 2
- Click on add another list then select the list you want to sync.
- 3
- Then choose what bots you want to sync from, and click Save.

How to sync more than 1 bot to a list
So you have added your list and see the option to sync all bots or specify a bot. But maybe you want more than one? Heres how to do it.
- 1
- Go to your apps page, find the Elastic Email integration and click View preferences
- 2
- Click on add another list.
- 3
-
Select the list you want and choose to specify a bot.
- 4
- Then save your changes.

You can repeat this step but select a different bot each time to sync more than one bot to your list.
Mapping your Continually fields to Elastic Email
You can set where each of your Continually fields map to on your Elastic Email account.
- 1
- Go to your apps page, find the Elastic Email integration, and click View preferences.
- 2
- Click on Field mapping
- 3
- Select where each Continually field maps to, for the (email, first name & lastname fields ) you can control when to send them : Always send or When existing Elastic Email field is empty or Never send them.
- For the other fields you need to create a corresponding Elastic Email field first then add its name OR you can write the name of the field, specify the data type and the field length and Conitnually will create those fields automatically.
-
