ChatGPT: connect and use AI to answer your leads' questions
This integration allows businesses to automate responses and engage with a large number of customers simultaneously. ChatGPT can understand and respond to customer queries, offer personalized recommendations, provide product information, and assist with troubleshooting. Its flexibility and adaptability make it suitable for a range of industries, such as e-commerce, healthcare, banking, and more.
This article will cover:
Connect ChatGPT app
You can find the ChatGPT app on the Apps page in the General section.
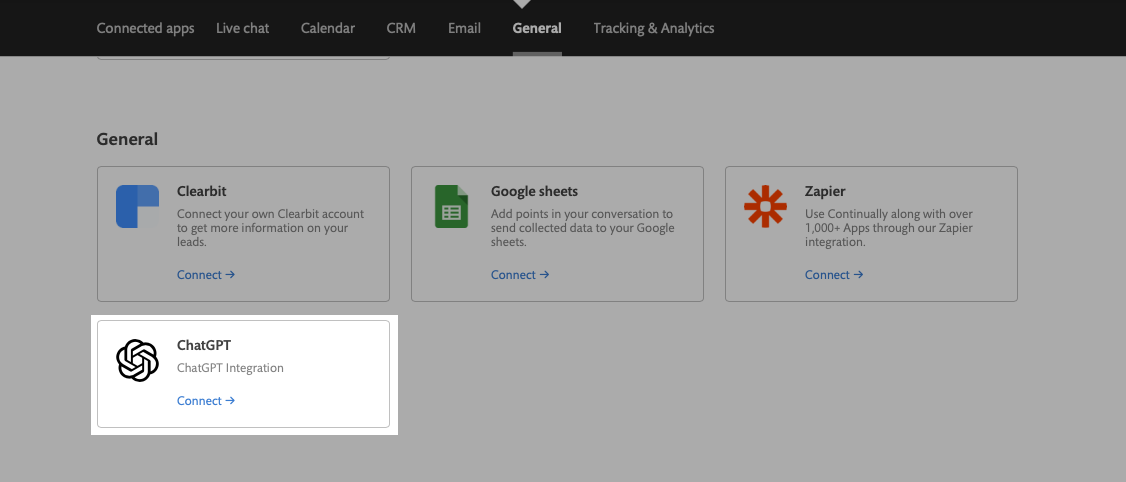
Click on the Connect button to open a preferences page. On the Preferences page, you will need to add your OpenAI API Key to connect the account. You can find the key on your User settings page inside the OpenAI account.
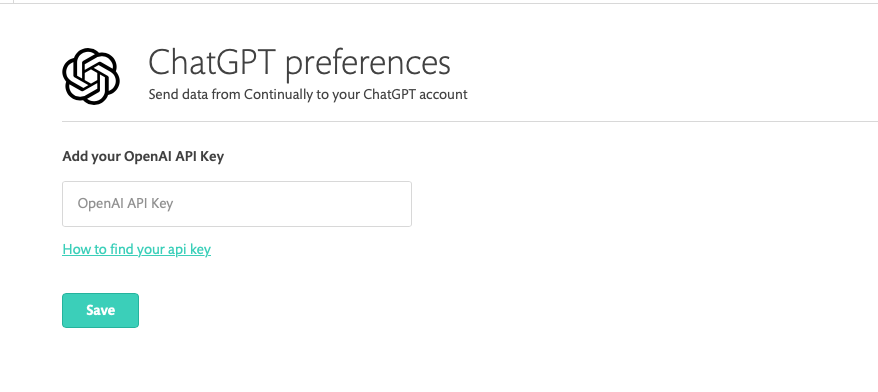
Click on the Connect button and you're ready to go.

ChatGPT object overview
This integration is implemented through the ChatGPT object that can be placed anywhere in the bot flow. You can find the object in the Apps section on the object's sidebar. Just drag it wherever you want to place it and connect it to the flow.

Let's click on the object and see what it can do.
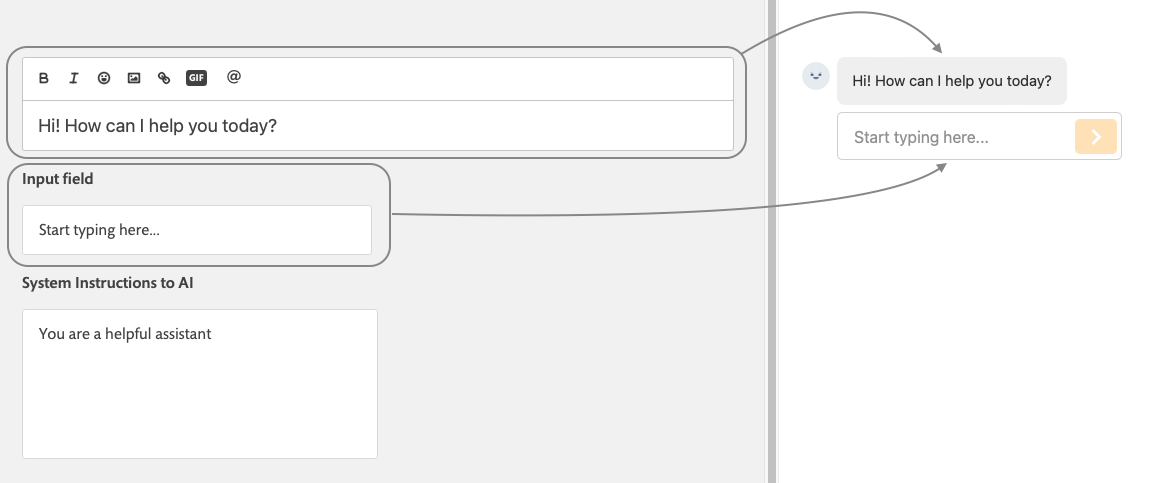
Inside the ChatGPT editor, there are 3 constant text fields.
- The Message field allows you to write any prompt for your leads to enter their question/reply into the input field below.
- The Input field allows you to change/localize the placeholder of the Input field
- The System Instructions to AI is a field that you can use to create custom prompts for AI to incorporate your preferences or specifications that you wish ChatGPT to take into account each time you generate responses. You can learn more about how to write them here.
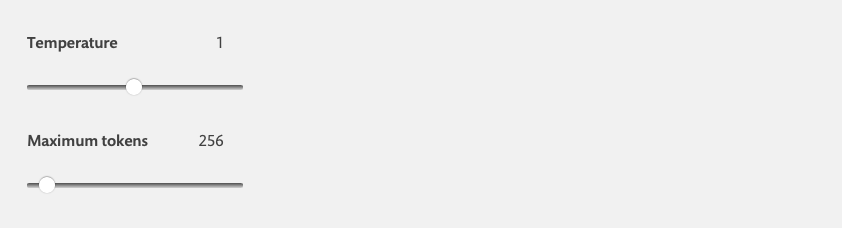
Then there are 2 sliders that allow you to choose the Temperature of the replies and the number of tokens you should use for these replies. You can either slide the knob to change the number or change it manually by clicking on the number to enter the correct one.
- The Temperature is a hyperparameter used in ChatGPT, to control the level of randomness or "creativity" in the generated text. Higher temperatures result in more diverse and unpredictable output. Whereas, lower temperatures result in more conservative and predictable output. By default, the number is set to 1
- The Maximum tokens are the number of tokens this particular object is allowed to use per each request. You can find out more about tokens and how to count them here.
All the mentioned previosly features are basic for the ChatGPT object. They allow you to configure an integration much as the External API object with sending the request, getting the response, and moving forward. But there is a way to make a continuous conversation between a lead and AI using this object.
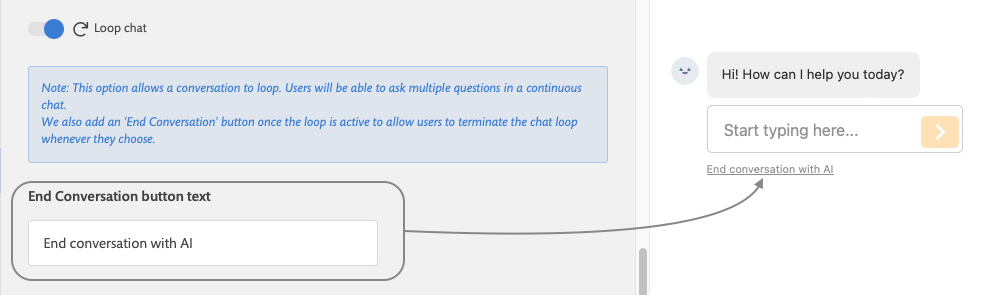
- The Loop object option allows the object to loop the conversation. After the first initial question and the reply, instead of moving forward to the next object, it repeats itself, allowing your leads to enter a further reply/question. The conversation will continue until a lead clicks on the End conversation button.
- The End conversation button text field allows you to customize the text on the End Conversation button.

- The Save as custom field option is a necessary step in displaying the response from ChatGPT. You won't be able to use the integration without it. So you need to turn it on and choose the appropriate custom field.
- The Set delay option allows you to set a delay for the loop. If you set a 10 seconds delay, it means that after the AI's first response, it will wait 10 seconds before suggesting an input field for the next question/reply.

Response routing is just an informative section that gives you an idea of how we will route the conversation depending on ChatGPT response or a lead's prompt.
ChatGPT object routing
The ChatGPT routing is similar to the External API object but because of the Looping feature, it has nuances.
The ChatGPT object has 1 entry point on the top of the object that allows you to connect it to the flow and 3 exit points.
- 200 - Success. This is the path that the object will take if there is a response from the ChatGPT
- Error. This is the path that the object will take if there is either an error or no response from Chat GPT
- Exit. This is the path the object will take only after a loop has been terminated (by clicking on the End Conversation button). So, this route will be taken only if the Loop chat option is activated for the object to begin with.

Setting up a conversation with ChatGPT
Steps:
Assign a custom field to the object
This is a required phase for all ChatGPT objects. Without a custom field, the integration won't show any responses.
- Add a ChatGPT object on the canvas
- Click on the @ button on the Bot builder tool bar;
- Click on 'Add Custom field' button;
- Enter any name that makes sense to you. You can use Latin letters and Arabic digits without spaces and special characters (except for _ (underscore));
- Click on the 'Create' button
- Close the custom field modal and go to the object editor
- Click on the intended ChatGPT object
- Turn On the 'Save as custom field' option
- Choose the created custom field from the drop-down
- Click on the 'Save' button
Do not use the same custom field for different ChatGPT objects. Create separate custom fields for each ChatGPT object.

Route the successful response
- Add a message object on the canvas.
- Click on it to open the object editor.
- Add the created earlier custom field (the one we assigned to the ChatGPT object)
- The added custom field should have a rectangular field for entering a path for the JSON structure ( this is the structure we get from ChatGPT as a response)
- Type '.result' in the rectangle and click on the 'Save' button (this will define the path for the reply)
- Connect the Success exit point to the added message object.
The ChatGPT object will route leads to this object when there is a response to display

Route the Error response
- Add a message object on the canvas.
- Click on it to open the object editor.
- Add a message explaining that the service is unavailable right now.
- Click on the 'Save' button
- Connect the Error exit point to the added message object.
The ChatGPT object will route leads to this object in case there is an error or no response
Set up a one-time reply
If you want your leads to be able to send only one request and get only one reply, then this configuration is for you.
All you already did should be enough for the object to work. But you will want to customize the messages and build the object in your bot.
- Click on the ChatGPT object to open the editor.
- Customize the message area
- Customize the placeholder in the Input field
- Customize the Instructions
- Customize the Temperature of the response
- Customize the Maximum number of tokens
- Click on the 'Save' button
- Add some introductory objects before the object and connect them to the entry point of the ChatGPT object. Or find a place in your existing bot where you want to put it.
- Connect the Success message and the Error message to the objects that should go after them. (otherwise, the bot will stop on them)

Try it out on the preview.
Set up a looped chat
To create a looped chat, you will have to do everything mentioned in the previous steps and add some additional details:
- Click on the ChatGPT object to open the editor.
- Click on the Loop chat option to turn it ON
- Customize the text on the End conversation button
- Set the required delay between loops
- Click on the 'Save' button
- Add an additional message object and customize it text with the acknowledgment of the request to end the conversation.
- Connect the new object to the 'Exit' route on the ChatGPT object.
- Connect the new object to the following objects if you want the bot to continue after this message.

Try it out on the preview.

The preview (both on the bot-builder and on the separate page) has a restricted functionality. To make sure it works as you expect try our live preview.
The integration is available starting from the Professional plan.